Recently, my colleague was tasked with performing a source code review on a relatively large codebase. Given the size of the project, I started exploring whether a locally hosted LLM could be used to assist with the review, together with manual analysis.
The key requirement was that everything must run locally. The source code contains sensitive information and cannot be uploaded to any cloud based service.
Initially, I considered using Ollama to host an LLM locally to interact with the model by manually uploading code snippets. This approach ensures that all processing remains on the local machine. While exploring this further, I came across a tool called FalconEye, which is designed specifically for LLM assisted source code review.
This post documents the setup, usage, and initial findings of FalconEye. The goal is to evaluate how useful LLM assisted analysis can be when combined with traditional manual source code review.
Why FalconEye?
FalconEye combines several components that are commonly used in modern LLM based analysis workflows.
Key reasons for using FalconEye include:
- No Pattern Matching: Uses pure AI reasoning to understand your code semantically
- Context-Aware Analysis: Retrieval-Augmented Generation provides relevant code context for deeper insights
- Novel Vulnerability Detection: Identifies security issues that don't match known patterns
- Reduced False Positives: AI validation reduces noise from pattern-based false alarms
- Rich HTML Reports: Auto-generated interactive reports with executive dashboards and statistics
- Smart & Fast: Incremental analysis means re-scans only process changed files
- Privacy-First: Runs entirely locally with Ollama—your code never leaves your machine
Installation
Step 1: Install Ollama and Required Models
FalconEye relies on Ollama to run LLMs locally. Once Ollama has been installed and is running, execute the following commands to download the required models.
ollama pull qwen3-coder:30b
ollama pull embeddinggemma:300m
The purpose of each model is as follows
- qwen3 coder is a large code focused LLM used to analyse source code and identify potential security issues
- embeddinggemma is used to generate embeddings for indexing and semantic search
Note that the download process may take some time depending on system performance.
Step 2: Create a Python Virtual Environment
Using a virtual environment ensures that FalconEye does not affect other tools on the system.
python3.12 -m venv ./FalconEye
Activate the virtual environment using the following command.
source ./FalconEye/bin/activate
Step 3: Clone the FalconEye Repository
Once the virtual environment is active, clone the FalconEye repository from GitHub.
git clone https://github.com/FalconEYE-ai/FalconEYE.git
cd FalconEYE
Step 4: Install FalconEye
Install FalconEye using the following command.
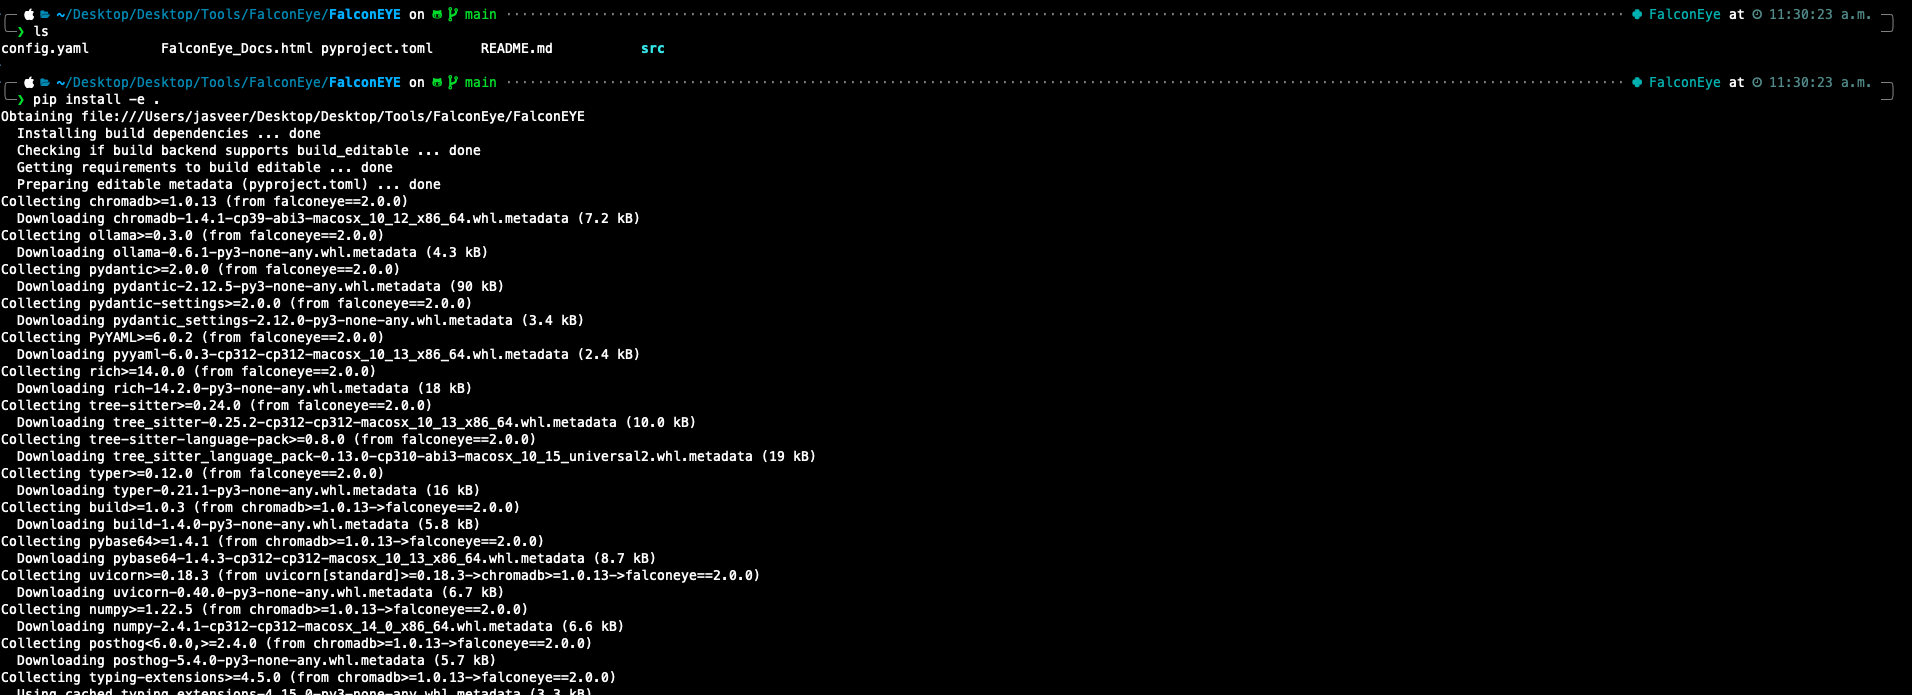
pip install -e .
At this stage, the FalconEye command line tool should be available. The figure below shows FalconEye being installed successfully.
Scanning the Code
Indexing the Codebase
Before performing any analysis, the codebase must be indexed. This step converts the source code into embeddings that will later be used for retrieval.
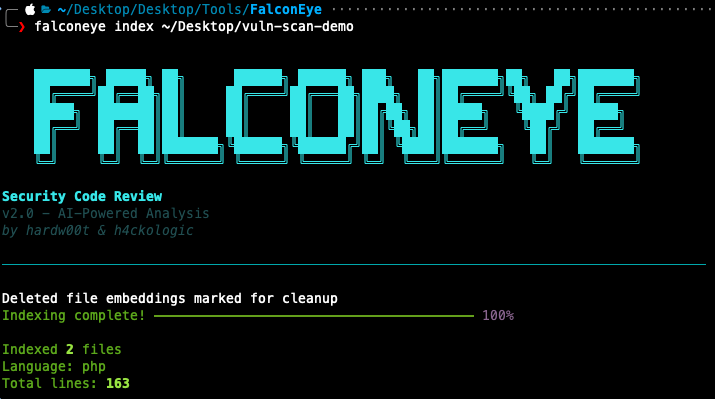
falconeye index ~/Desktop/vuln-scan-demo
Once indexing is completed, FalconEye displays a summary including
- Number of indexed files
- Detected programming language
- Total lines of code
The figure below shows indexing completed successfully.
Running the Security Review
After indexing, the security review can be performed using the following command.
falconeye review ~/Desktop/vuln-scan-demo
At this point, FalconEye analyses the indexed codebase and reports potential security issues.
The figure below shows that multiple vulnerabilities have been flagged by FalconEye.



Note: FalconEye also generates a report. The above screenshots were taken during the scanning stage.
Analysing the Findings
From the results, FalconEye successfully identified several high risk issues including:
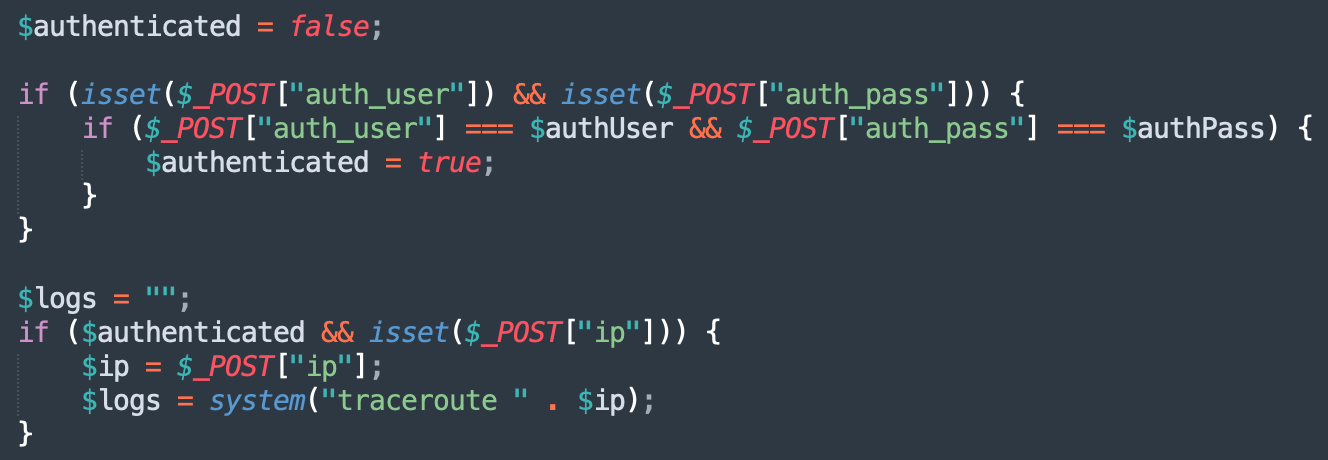
- Command injection vulnerabilities caused by unsanitised user input
- SQL injection vulnerabilities due to unsafe string concatenation
- Hardcoded credentials in the source code
These findings are consistent with what would typically be identified during a manual source code review. The figure below shows a snippet of the source code that confirms the application is vulnerable.
User supplied input is passed directly into system level commands:
SQL queries are constructed using unvalidated input:

Authentication credentials are hardcoded in the source code:
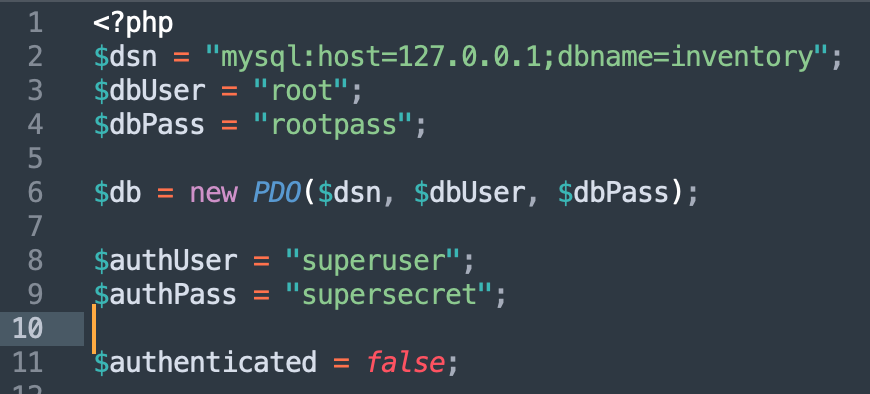
This confirms that FalconEye was able to correctly reason about security risks rather than simply matching patterns. Additionally, when my colleague used the tool during the assessment, it successfully identified the majority of the vulnerabilities, which was highly impressive.
Key Takeaways
Based on this initial assessment, FalconEye demonstrates the following strengths
- Provides meaningful context around why the code is vulnerable
- Works well as a prioritisation and review assistance tool
- Performs analysis fully offline which is critical for client engagements
That said, FalconEye should not be treated as a replacement for manual source code review. Human validation is still required to confirm exploitability, assess business impact, and eliminate false positives.
DIsclaimer: FalconEye was run against a demo application that was created purely for this blog. Results against real world applications may vary depending on code quality, framework usage, and application complexity.